
Pocket Grannies Crochet Pattern
- Jacquelyn Zunic

- Dec 5, 2022
- 3 min read
Updated: Aug 7, 2024
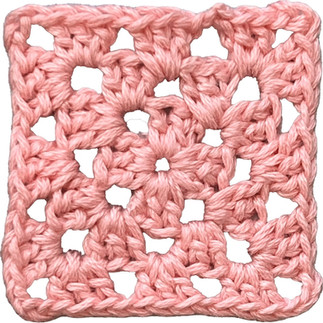
There's nothing quite like a granny square. This classic crochet motif has a ton of different ways to work it up, all of which have their own merits and uses. I think there's as many ways to make a granny square as there are crocheters. For this teensy tiny project, I've had the most success with the instructions I've listed below.

Pocket grannies are a super fun project that works up quickly and is too adorable to handle. I love working up bunches of them and using them for larger projects. Great to use up floss scraps from embroidery projects! I like to use this to make mini flowers, so I chose yellow, white, and green to mimic a daisy.

I call them pocket grannies because they’re pocket-sized! The name may have a strong influence from Dale Gribble's Pocket Sand defense.
Y'all know I had to make a gif of that, not sure when it'll come in handy, but it exists.
Skill Level
★★☆☆☆
Not too hard, but requires working with small, somewhat finicky stitch structures, and very basic color work.
Abbreviations (U.S. Terms)
ch: chain
st: stitch
sl st: slip stitch
sp: space
RS: right side
Rnd: round
Tools and Materials
As an Amazon Associate I earn from qualifying purchases, at no cost to you.
2.25 mm B/1 hook — I used the hook from this pack
Tapestry needles for weaving in ends — I love these full eye needles
DMC Embroidery Floss, 13 ft / 4 m total yardage
3 ft / 0.9 m of yellow / color A
4 ft 2 in / 1.25 m of white / color B
5 ft 10 in / 1.78 m of green / color C
Final Size
1.5" H x 1.5" W
Technical Notes and Gauge
Worked in joined rounds, RS always facing. Rounds are worked in the spaces created by the chain stitches, not into the previous rounds’ stitches themselves.
Upon fastening first color, project measures 0.625".

The Pattern
All rights reserved. For personal use only. Do not copy, edit, redistribute, or sell this pattern. Commercial licensing is available, contact hello@jcqzu.com for inquiries. Cheers and enjoy!
Instructions
ch 4 in color A, sl st into first ch to form ring
Rnd 1 (color A): ch 3, 2 dc in ring, ch 2, (3 dc in ring, ch 2) 3 times; sl st into beg ch 3 using color B — break yarn color A


Rnd 2 (color B): ch 3, 2 dc in same corner; (move to next corner, 3 dc, ch 3, 3 dc) 3 times; move to last corner, 3 dc, ch 2; sl st into beg ch 3 using color C — break yarn color B

Rnd 3 (color C): ch 4, 3 dc in next sp, ch 1; (move to next corner, 3 dc, ch 3, 3 dc, ch 1, move to next sp, 3 dc, ch 1) 3 times; move to next corner, 3 dc, ch 3, 2 dc; sl st into third ch of beg ch 4 using color C, break yarn color C

Finishing
Weave in ends. Block.
Tada!


What to Make
As I release patterns that contain Pocket Grannies, I'll link them here so you can make larger projects!
What's Next
Share on Instagram or Facebook: Share your project on social media with the hashtag #jcqrochet so I can see your creativity!
Leave a comment below or hit me up. If you have any questions or comments, don’t hesitate to reach out to me at hello@jcqzu.com.
✌ jcq

Comments